Learn about Simi
Containers
The Containers section helps you organize your AI agents into structured groups, making your workspace cleaner, easier to navigate, and more efficient to manage.
Watch the video above to see the Containers section in action and learn more about how it works.
Creating a Container
- Enter a name for your container.
- Click Create to add the new container to your workspace.
- The container will be created and ready to organize your agents.

Adding Agents to a Container
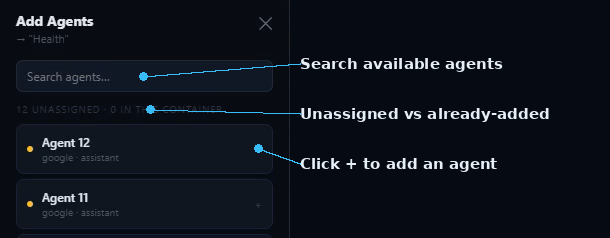
- Click Agents to display all available agents.
- A pop-up window will appear listing every created agent.
- Select the agents you want to include by ticking their checkboxes.
- Save your selection to add the chosen agents to the container.
Assigning Agents
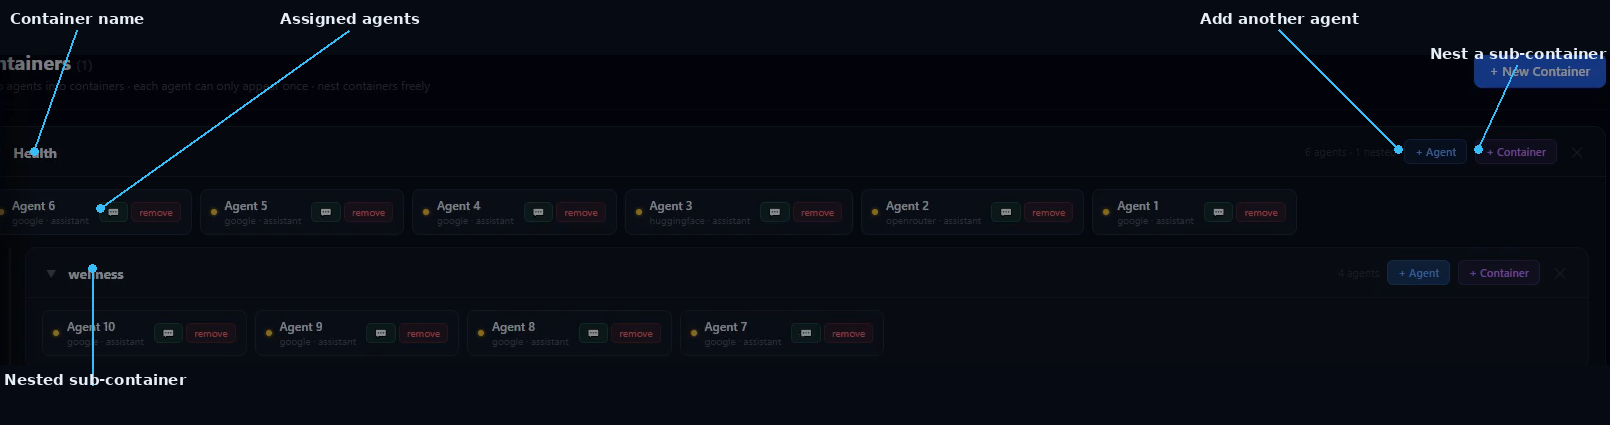
- After creating the container, add the selected agents.
- Each agent can belong to only one container at a time.
- This prevents duplicate assignments and keeps your workspace organized.
- Note: Restricting agents to a single container helps maintain a clean and well-structured workspace.
Organizing Your Workspace
- Containers make it easier to manage large numbers of AI agents by grouping related agents together.
- You can use containers to organize agents by:
- Research topics.
- Projects.
- Departments.
- Subjects or courses.
- Business workflows.
- Areas of study.
- Any other category that fits your workflow.
- This structure makes it easier to locate the right agent, reduce workspace clutter, and efficiently manage multiple AI projects.
Key Features
- Create custom containers.
- Add agents to containers.
- Create nested sub-containers.
- Organize agents by project or topic.
- Prevent duplicate agent assignments.
- Keep your AI workspace clean, structured, and easy to manage.
Try Containers in SIMI
Explore Containers and the rest of SIMI's multi-agent workspace for yourself.
Explore SIMI